
Using sprites looked promising, but it still wasn’t working — I needed to reduce their usage somehow.
That’s when, while reading more about the Game Boy’s architecture, I stumbled upon something that seemed like salvation — something the engineers had left there to save my life (well, not really): the window, a second, alternate tilemap.
The window sounded like everything I’d ever dreamed of. Another graphical layer that moves independently of the sprites and the background? And on top of that, it can be drawn over the others?
That meant I could move one part of the screen independently from the rest.
I just needed to place the window strategically over part of my board and, between the background scroll and the sprites… surely I could make everything move separately however I wanted.
But as I started learning more about the window, I realized things wouldn’t be that easy.
The window has two serious limitations: the first is that it’s not really a true layer — it has no transparency, and its draw order can’t be changed. It always takes priority over the background.
The second: it can’t be placed just anywhere on screen.
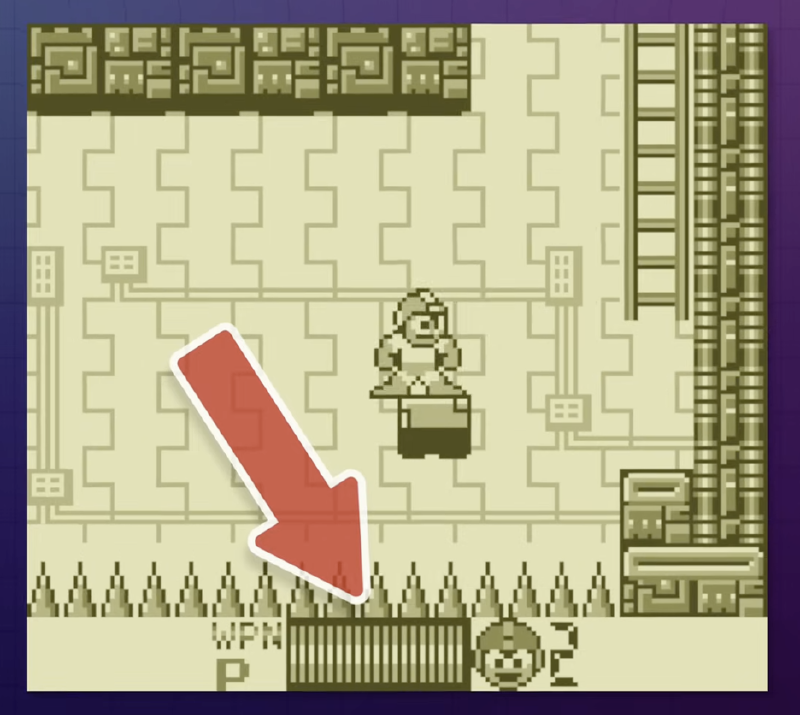
Game Boy titles often used the window layer for HUDs or pause menus.
Source: Game Boy Graphics & How To Code Them (2:17) by NesHacker
The window actually overwrites the portion of the screen where it’s active, and that area can’t be arbitrary — it must cover everything from a given X,Y position to the bottom-right corner of the Game Boy’s display.
That makes it impossible, practically speaking, to position it only on the left side of the screen.
However, by manipulating the registers mid-frame, it is possible to make it cover partial vertical regions — for example, just the top half of the screen, or leaving a gap between top and bottom sections.
Taking all these limitations into account, I started running (mental) experiments to see how I could cover every possible block-pushing scenario.
A bit of advice: don’t do this — just start coding. You’ll reach the same conclusion much faster.
But following my own delusion, I began imagining the nastiest corner cases. For example: what if I only wanted to move the blocks in the center of the board but not the ones on the sides?
Well, in that case, sprites could come to the rescue.
But what if I only wanted to move one or two blocks? Then I’d have to do the opposite — use moving sprites and a static background, sure, but then…
That’s where my brain started to melt.
While it might be technically possible to cover most cases by strategically using all three tools (Sprites, Background, and Window), there was no guarantee that some edge case wouldn’t break everything.
And in the best-case scenario, I’d end up with a graphics engine built out of patches and hacks — completely unmaintainable.
No… it had to be simpler, more consistent. I needed internal coherence.
Once again, the hardware didn’t seem made for my game; I felt like a kid trying to build a Game Boy out of LEGO pieces.
Was I asking for too much? Maybe.
But there was one idea that had been floating around in my head for a while — I had a plan: partial scroll to the rescue.
Let’s pause for a second to explain once again how the PPU rendering mode works on the Game Boy.
Graphics are drawn line by line, from top to bottom, just like a CRT display from that era.
This design intentionally mimics the NES development model, including the waiting periods between lines (hblank) and after the full frame has been drawn — vblank, which we already mentioned in the previous post.
At each of these moments, the console triggers an interrupt to indicate that it’s entering one of these phases — either hblank or vblank.
This is useful because these are the only safe times to copy new tiles into video memory — whether into the tilemap or the tileset.
But they can also be used to create mid-frame effects, like changing the scroll speed on a specific scanline to simulate depth or parallax.
Example: Batman: Return of the Joker for NES uses mid-frame techniques to create an impressive parallax effect.
In my case, where entire rows or columns of blocks need to move, such an effect would be extremely useful.
I could simply adjust the scroll on a few lines instead of having to copy new tiles into the background every time the player dragged a column.
The problem was that this would only work for rows of blocks — not columns — since the Game Boy has no way to trigger interrupts at arbitrary vertical positions within a frame.
Still, in theory, it would be possible to synchronize with the rendering time of each line to modify the scroll registers at a specific horizontal position.
Modern documentation briefly mentions this possibility, but makes it very clear that trying to manipulate graphics while each line is being drawn is extremely risky.
The Pan Docs provide detailed information about the PPU’s timing, even describing how it can vary slightly between lines.
And that, my friends, is the problem: the PPU’s line rendering time isn’t constant — and that’s one of the main reasons why synchronizing with it is so difficult.
It took me a while to realize that the registers controlling scroll weren’t actually bound by this limitation.
Even so, the documentation warned that manipulating them at that point was incredibly tricky and often unstable.
Later I’d learn why, but let’s not get ahead of ourselves.
At that point, I was still thinking about using a combination of techniques.
I planned to run tests to see how far I could really control the scroll registers, but since that had to be done in assembly, and I hadn’t even written my first hello world in that language yet, I kept putting it off for quite some time.
And so, years passed with no real progress — until the events I mentioned in my first post happened: losing my job, and discovering that piece of code — Canyon Racer — which proved that it was indeed possible to manipulate a horizontal partial scroll, even if only under very limited conditions.
In the next post, I’ll show how I finally started programming — initially just to quiet my obsession and see if my idea was even possible, but ending up with a pretty slick technical demo.
Resources mentioned:
Game Boy Graphics & How To Code Them - NesHacker · PanDocs · Canyon Racer